Sunday 25 September 2022

The Muse

Glenn Gould


Two months ago a problem I had all my adult life - a feeling of meaninglessness of art and a regret of being an artist, came to a crisis.  Despite of having a lot of orders I couldn't make myself work.  

Luckily at the same time I was exploring the oeuvre of a favourite pianist, Glenn Gould, who I listened to on and off most of my life, and only knew for his Bach. This time I heard his Beethoven, his moving and wise "contrapuntal radio" - modernist operas about the meaning of life, read many of his articles and interviews, and carefully watched his performances.

The unexpected result was the discovery of myself, a flinging open of inner doors to the source of art, that were shut since my teens, and an avalanche of inspiration that swept all the crises away as I welcomed my new muse.

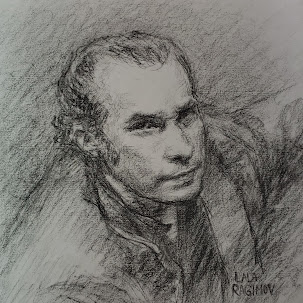
Today on September 25, 2022 Glenn Gould would have turned 90, and I wanted to celebrate the great musician-thinker with some art and thoughts in this post and possibly some future ones


Gould playing Beethoven
 
 Glenn Gould was a utopian – to him art was a moral undertaking, and he spoke against such evils as professional sport, music competitions, applause, live concerts, and even professional art as a whole, as in his utopian future every human would become a non-competitive, nonviolent artist. His alternative to the sin of competition was the virtue of communication. I believe these ideas created the magic effects of his music-making. The sublime talking piano, the gestures and groans of a religious trance, the creaking chair, the stomping feet communicate the creative experience to your own mind and body, and convert you into art by revealing your own often long-forgotten path to artistic ecstasy, if you only care to follow.
 

 Glenn Gould - a 17mm blue chalcedony intaglio carving

 Here is Gould's own writing on the purpose of art, from the article "Let's Ban Applause":
"…the justification of art is in the internal combustion it ignites in the hearts of men and not its shallow, externalized, public manifestations. The purpose of art is not the release of a momentary ejection of adrenaline but is, rather, the gradual, lifelong construction of a state of wonder and serenity. Through the ministrations of radio and the phonograph, we are rapidly and quite properly learning to appreciate the elements of aesthetic narcissism - and I use that word in its best sense - and are awakening to the challenge that each man contemplatively create his own divinity."


A compilation of my drawings and carvings dancing to the Goldberg Variations for Glenn Gould's birthday
 

Sunday 27 December 2015

Ancient chain weaves


The favourite chain weave of all ancient European civilizations was the so-called loop-in-loop pattern.  It has been used in jewellery from Ancient Sumer through most of Ancient Europe and Middle East, including Ancient Egypt, Greece, Rome and Byzantium.  It disappeared in Medieval times only to be revived in the 1800s with all other things "Etruscan" and ancient.


Because of my anachronistic tendencies, I have always wanted to possess and wear necklaces of this type. In 2014 I got a chance to learn how to make them, and so far I have made six of three different weaves and four different alloys of gold and silver.  My technique is based partly on the one described in the well-illustrated and practical book “Classical Loop-in-Loop Chains” by J. Reist Stark and J. Reist Smith, partly on the experience and advice of jewellers I consulted, and on my own personal trials and errors.

The wire was made by a professional jeweller (assisted and photographed by me as you can see below).  The chains themselves were fused and woven by me. 


MAKING WIRE 


In ancient times wire was made by rolling twisted metal strips between two heavy slabs of stone or metal creating a characteristic spiral seam. From Medieval times jewellers started using drawn wire, pulling metal rods through a series of holes gradually diminishing in size. This is the method I watched and photographed at a jewellery studio:

1.


First the 24k gold grains are weighed in correct proportion to the grains of silver and copper. The mould is then prepared by rubbing it with machine oil and warming it up.

Reist Stark and Reist Smith in their book suggest a recipe for 22k gold with a high proportion of silver for ease of fusing (the so-called eutectic gold: 91.6% Au, 6.3% Ag and 2.1% Cu). In my experience, the standard 22k gold alloy (91.6% gold with the remainder evenly split between silver and copper) was easier to fuse.

The authors also state that their 22k alloy is close to that used in Greek and Roman chains, but from what I read in other sources, the alloys used in antiquity were extremely varied, from under 18k to nearly 24k, and seem to have been around 23k most of the time.  The conservation journals and books I read did not have specific results for chains, so I still don't know what the typical alloy for chain wire was in the Antiquity.

2.


The gold silver and copper shot is then melted in a crucible while being stirred with a graphite rod (graphite is used because it doesn't transmit heat). The liquid metal is then poured into the mould. The clamps are released, and the resulting 22k ingot is removed.

3.


This ingot was then rolled on a rolling mill to reduce its thickness to 1.5 mm at which point the draw plates could be used to reduce the diameter of the wire even further. The wire was annealed when it got too work-hardened by these manipulations.

After the final annealing, the jeweller rolled the resulting wire into coils on a lathe (not shown), and from that point I took over.


WEAVING THE CHAIN 

1.


First I cut the springy gold wire coils into links. Then I butted the link ends together and made sure there is tension between them to keep the gap small. I laid out the links on a piece of charcoal, and fused them with a small and very convenient micro-torch (ES-1000) using a small and “bushy” reducing (low-oxygen) flame.

The hardest part of the process is fusing the links: any blinking or breathing at the wrong time can make you miss the split second in which the link melts and turns into a cute but useless little torque with shiny beaded ends.  Part of the links always get spoiled this way, especially if they are silver, but the process itself is not difficult to understand.  It took me only about thirty minutes to learn how to consistently produce viable fused links.

After fusing, links need to be tested by pulling them into ovals with round-nosed pliers.  As the links are stretched, the badly-fused ones break, ricochet on all available objects, and fly to the far corners of the room. Despite precautions, some of my chain-making time was spent on the floor sourcing scrap metal.
The links that passed the test are pinched in the middle and curved into a butterfly-like shape. After the butterflies are annealed, the weaving can begin.


2.


The only tool needed for weaving a standard chain is an awl to open spaces between the links and to pull on the open ends of each freshly inserted link to tighten the chain. The first chain I made (a commission for a client) was a thick “double loop-in-loop” (still oxidised and unpickled on my neck in the central picture, pickled and shiny to the right).  For weave comparison, the silver chain section on the top right is the “single loop-in-loop” weave, the simplest of all, where each link is connected to only two other links instead of four.

I later made another chain from 24k gold (seen in the picture second from the top), and it came out looking more irregular and loose because the links were softer and stretched more during the weaving process. I did enjoy the gleaming polished gold look as it came out untarnished from the flame.

My favourite alloy to work with was the standard half-copper half-silver 22k gold. It was easier to fuse, slightly harder to weave but produced a very strong, even-looking chain:


Fine silver, on the other hand, was the hardest material to work with. I used it to create the more difficult “two way” double loop-in-loop chain for myself, and had to constantly fight links not fusing well and breaking.  In the process of weaving, a two-way double chain looks like a cute little monster with its mouth open:


3.

After the chains are woven they need to be annealed, pickled, tamped with a hammer or pulled through a wooden draw-plate to make them more dense and uniform. After such treatment they become stiff like sticks, and need to be massaged and bent in all directions until they become flexible and sensuously serpentine. I found that my fingernails suited that purpose best, and additionally the procedure gave them this cool look:


To conclude, the process of ancient chain-weaving demands a lot of concentration and patience, even if you start with ready-made wire. The beautiful results make up for the effort completely and are definitely worth it, especially for those who enjoy wearing and touching history like I do.


***

Wednesday 30 September 2015

Andrea del Sarto: The Renaissance Workshop in Action. An Artist's Review


One of the best exhibitions I have seen, "Andrea del Sarto: The Renaissance Workshop in Action" is, at the moment of this writing, travelling from the Getty Museum to the Frick Collection where it opens on October 5 for the lucky viewers there.  

While star paintings are always on display in museums, drawings, no matter how beautiful, are hidden away in the vaults because of their sensitivity to light. This fact makes this show is a unique opportunity to see this rarely exhibited Renaissance master's most rarely exhibited works from world collections.  For an art historian or any educated artist these drawings are so iconic and familiar from reproductions that it is a dream-like experience to see them "live" all in front of you together with several of his magnificent paintings. It took me a bit of time before my head stopped spinning from being surrounded by such celebrities, and I could concentrate on studying in those magical rooms.

I'm very grateful for the inspiration and schooling this incredible show provided me with. Below are some of the copies and reconstructions I made at the show or inspired by it.


To learn, an artist in the "classical" representational tradition has to copy. When you copy from a colour print or a computer screen, you cannot compare the two drawings well because of size and medium differences.  But when you are standing in one room with the original drawing, and you have a piece of genuine red chalk or a substitute and some paper in your hands, it's a learning experience like no other.

Technical information:

For the copies appearing below genuine red chalk (Elba, sold by Zecchi) and genuine black chalk (France, sold by Kremer Pigments).  For some drawings I used the substitutes as noted.  For paper I used the Fabriano Ingres laid as well as Strathmore "toned tan" (which is sadly smooth but has a beautiful irregular colour), both not authentic, but then authentic paper is not to be found anywhere.

The chalk comes in chunks that I then saw into thin sticks.  Considering some of the filigree lines on del Sarto drawings he must have sharpened his chalks very well for certain passages.


Red chalk - the lighter one is from Russia the darker from Elba
and some tools to saw it into sections

What I also noticed is that del Sarto (as well as Rubens and many others from 1500-1600s used a harder red chalk than is available now.  The closest ones in hardness (though still not hard enough) are modern artificial waxy pencils such as Pitt oil base, Cretacolor oil and Koh-I-Noor Gioconda, but they don't work well because they are nearly impossible to smudge.


Original on the left, Genuine red chalk copy in the middle, Cretacolor "oil" pencil on right


Copy after del Sarto 
Pitt pastel pencil - maybe a little softer or as soft as genuine red chalk


Red chalk from Elba on Fabriano Ingres


Genuine black chalk on Strathmore toned tan


Study of the Head of a Young Woman, about 1523,
Elba sanguine on Fabriano Ingres paper


Red chalk from Russia. Beautiful colour, but too soft.
(this drawing wasn't in the show,
but I stumbled upon a very good quality image...)

Sunday 31 August 2014

Intaglio gem carving

(Updates: for the newest Lala gems you can follow me HERE
 
And please see Lala Ragimov's Intaglio Gems page with photos and ordering information)

My copy after a circa 300 BC intaglio gem from 
Ionic Greece (Hermitage). March 2016


Here are my first experiments in gem engraving. Ancient carvers worked with a simple machine using oil and emery powder slurry to carve the gems (mostly chalcedony and agate):  
I made my intaglios using a binocular microscope and an electric rotary tool with sintered diamond bits and a continuous water supply.


Here are my results so far:

My first intaglio, Pegasus (agate).


Omphale, carnelian.
This was a freehand copy after a larger Roman gem.


A cupid riding a panther, carnelian intaglio


An engagement ring commission on chrysoprase in 2015


Head of Zeus Olympios intaglio on carnelian and impression,
in progress March 2016


More photos of the process:


Once the gem was on the dop stick, I sketched the design using diamond point and silverpoint and blocked the main shapes in with large round diamond bits.  
Further work was done using smaller round, wheel- and cone-shaped bits.

The biggest difficulty was not being able to see well because water obscures the view as you carve, though not as much as the thick oil and abrasive slurry, which I will try using later.  Another difficulty is learning to control the rotating tool especially when making curved lines.


***


In parallel I have also tried my hand at caving miniature black coral sculptures using the rotary tool with steel burs, abrasive wheels, nylon brushes, and polishing wheels and compounds.  This was my first time sculpting in the round. 


Cat and rabbit miniature sculptures in black coral

***

Monday 28 April 2014

"An Introduction to the General Art of Drawing" by Willem Goeree. Full text.


In 1668 Willem Goeree (1635-1711) published an influential treatise on drawing, Inleydinge tot de Al Ghemeene Teycken-Konst.  In comparison to the treatise of Leonardo which it borrows from, it contains an unusually large amount of technical information about drawing materials and techniques.  It also deals with interesting practical matters of learning and teaching drawing, that other treatises don't touch upon.  The book in Dutch was republished and reworked several times and translated to German and English in the 1600s and later. I also find bits and pieces of its text used in numerous other drawing manuals and treatises (e.g. Salmon, de Piles, Jombert) without a mention of Goeree's authorship.

I have transcribed and posted the 1674 English translation keeping the original spelling.  There are three illustrations in the text.  I substituted them with corresponding plates from editions of Goeree publicly available on-line.  

This English translation also contains many plates at the end that I haven't included because of their copyright status.  These plates don't appear in Goeree books in Dutch or German. They represent the traditional drawing book repertoire: eyes, noses, mouths, hands, feet, faces, and whole figures, most of them rather unrefined copies of well-known drawing book prints (I could recognise Fialetti, Palma il Giovane, Reni, Cousin, maybe Bloemaert and Guercino; others I have not yet identified). 

I've done this project on my own and without feedback, so I will appreciate any comments, corrections, suggestions and any other input.   I would also be happy with a greeting from anyone who studies this subject.


Illustration from a 1678 German edition (digitized here)
________________________________________________________

AN INTRODUCTION TO THE GENERAL ART OF DRAWING 
(for full name see title page)


CHAPTER I
What the Art of Drawing is, and in what it doth consist 

list of side notes:
Wherein the Art of Drawing doth consist. 
The Art of Drawing necessary to all men.
Principally to Picture-drawers.
The Art of Drawing is the soul  of the art of Painting. 
The Art of Drawing needeth the whole man
The Art of Drawing ought to have his Fundamental Rules as well as other Arts.
In the instruction you must go from step to step
A Simile or Similitude.
You must begin for the first step and go not the second before you well understand the first.
The Art of Drawing, beloved of all men.
The first Mover in this desire which comes of a natural inclination
Parents ought to observe the natural inclination of their children.
How you may know whether a child be born to the Art of Drawing or not.
Drawers and Picture Drawers must be of a singular nature.
Similitude.
What a young Learner must do.
How instruction is given.

Observation of this introduction
The Learner must apply himself to a good Master
Wherefore?


CHAPTER II

The first Beginning of the Art of Drawing.
 

The first exercise.
Perspective.
The first beginnings are about some particular Members.
Faces subject to most changes.
Oval.

What the Oval doth signifie.
Reason wherefore this Cross in the Oval is not understood of the young Learner.
A great fault.

Means to understand to draw with judgment all manner of faces.
A Fore-right face.
a 3/4 face
A face looking downward
A face looking upward.
A side face 
The profit that comes by the manner of this instruction.
Good Masters not always good Teachers


CHAPTER III
Of the Order and Manner to be Observed in the Art of Drawing.
 

First step. To draw after Draughts very profitable
Second step.  To draw after Pictures. Requires greater judgement. For what reason

The third Step.
A good Figure necessary to draw after.
The reason

The fourth Step
Perswasion to much drawing.
Example to others.
Custom in Rome
This should invite us to imitation.

CHAPTER IV
Of those things which in every degree of the Art of Drawing are necessary to be observed.
 

Drawing after Draughts.
Drawing after a Picture.
How to place a picture.
Distance.
Put your Principal right before you

The beginning of a Draught.
You must assure your self of every stroke.

With patience your must overcome your passions.
The Actions must appear as first in your scetzing.

To use care, thus in drawing a Schetz neater, that you lost not the action. 
Confer your draught with your principal.
Faulss (as soon as seen) to correct.
Better is one good Draught, then 100 without observation
You must sometimes behold your work with a fresh eye.
How it comes to pass that we better discern faults. 
Reason wherefore
Example


CHAPTER V 

Of the things which in the third Step, viz. in Drawing after Plaister-Rounds, or Embossed Works, are necessary to be observed.

To chuse a good light to draw after Plaister-Rounds.
Means how to amend the light.
At what height you shall chuse your light.
Night-light.
How to use the same.
Night-light giveth hard shades.
Remedy

What distance to use in sitting.
To observe how the parties the one under the other do appear.


CHAPTER VI

Of the anatomie, or Knowledge of the inward and outward forme of the Humane body, concerning Muscles and Motions of the Arteries.
 

To know Anatomy necessary.
Profitable.
Abuse.
Means to exercise themselves herein.
Anatomy in Plaister
Divers Books of Anatomy.
From the Books go to the life.
Not to make all Muscles.
Wherefore.
In what part you must observe your Muscles most.
Wherefore
Fat bodies have small Muscles.
Fair bodies must not be muscled hard.
Wherefore.

Of Muscles, many changes.
In what parts the most changes are incident.


CHAPTER VII
Of those things, which in drawing after the life, are necessarie to be observed and understood.
 

The natural Life reacheth all things.
To chuse a College
To what purpose
Place, light.
Model of what shape.
Place, light.
Divers manners to set the Model in action.
In all actions Members must make a Compact together. 
What Principally is to be observed in the good actions.
Examples of four footed beasts.
The good Position Of a figure.
Out of the tending of the Members to see what doth the figure.
The manner how to sit to draw. You shall not look too much, or imitate anothers Draught. 
Unskilful Drawers may place themselves with them that are experienced
For what reason. 
What is to be observed commonly. 
The Model shall not stand too long in his action.
Wherefore
Observation
To learn to draw compleatly
To draw Landskips


CHAPTER VIII

Of the several sorts of Chalks and Crions for the Use of Drawing, and upon what they are to be used.
 

Charcoal.
Black lead good for to scetch withal, principally for Masters, that are sure in their drawing.
Red chalk.
Black chalk.
Faults
Use.
Charcoal dipt in Linseed-oyl.
One or two houres.
Tobaccho---Pipe-clay.
White Chalk
Coloured Crions how to make them
Whereupon to draw

White Paper.
Coloured paper.


CHAPTER IX
Of the Use and Manner of Drawing.
 

Learners are counselled to follow their Principal
Manner how to do.
How to hold your drawing Pen.
Rouseling
Rouseling alone not very graceful.
Hatching and doseling a good manner.
Doesling.
Common mishap.
Remedie.
Manner how to smooth som heightenings.
Washing.

Use.

CHAPTER X

Of the General and his Parts, and how they must be understood and observed.
 

What Parts and Generals are.
Use
How to see them.
For what reason.
Example
Distinction.
Parts also have a generality in themselvs, altho' they are Part to the general.
Example.
Likeness of things dwelleth most in the general.
Example.
2 Example.

Contrapositio.

CHAPTER XI
What light and shadows be, and how thorow the same all things come to have their being.
 

Lights and shades can express all things.
Lights and Shades can express all things.
Prove.
General shadow.
Shadows upon shadows.


CHAPTER XII
Of the Plain, smooth, sharp, and sweet drawing.
 

Learners abhorre plain drawing.

CHAPTER XIII

Of the Heightenings.

CHAPTER XIV
Of the Reflection.
 

Reflections wheron they fall most.
Reflection by what occasioned.

Use not too much of reflection.
Wherefore.
Not to make reflection without cause.


CHAPTER XV
Of the Observation of Perspective of light and dark.
 

Necessitie of observation.
Similitude.
What you shuld take heed of in your observation
Dark comes forward as well as light.


CHAPTER XVI (one illustration)

Of the Circumferent or out-stroke, and his looseness and a good Position, as also of keeping of their Parts.
 

Scetch.
Circumferent stroak.

Strokes on the side of the light to make sweet.
Draughts must be drawn without circumferent strokes,
The life is without strokes.
Example
Strokes you must not draw till necessitated.
Small things are drawn without strokes, and appear as if they were.


CHAPTER XVII
Of the Finishing of a Draught.
 

Profit of this observation.
Heightenings never to make so high as the highest wont.
Observation
In Pictures dark and light difficult to distinguish.
Wherefore.


***
An Addition


PLATES (see my introduction above)